
Pruning
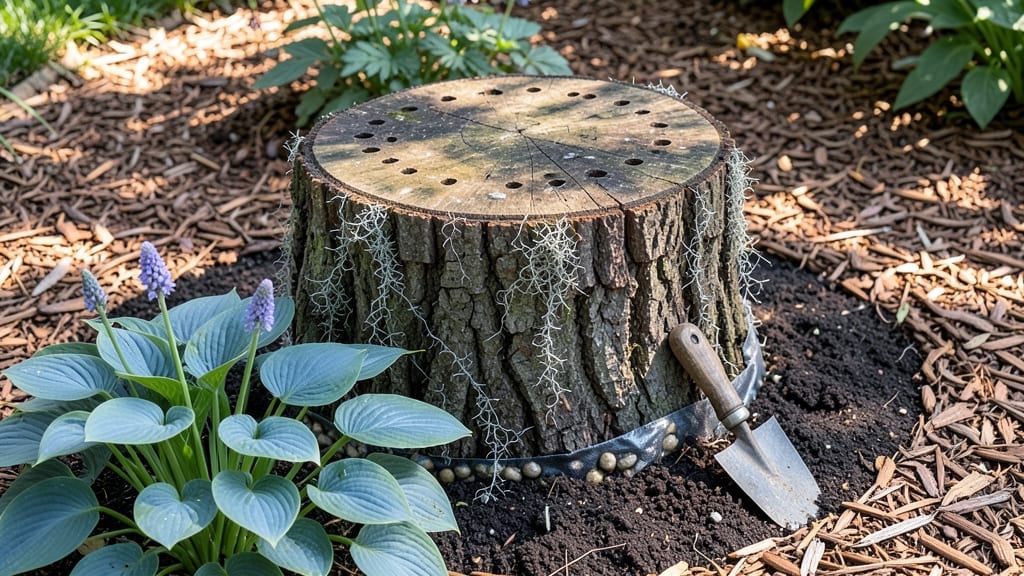
Turning a tree stump into a planter gives new life to something that might otherwise be considered waste. 🌿 The process is simpler than you think, and it creates a stunning focal point in your garden that’s both functional and eco-friendly—no green thumb required.
You’ll need basic supplies like a drill, a waterproof liner, soil, and your choice of plants. The key is ensuring proper drainage and securing the liner so it doesn’t shift. A few hours of work transforms an eyesore into a charming planter that adds rustic charm to any outdoor space.
Once planted, your stump planter becomes a thriving mini-garden that attracts pollinators and adds texture to your yard. The best part? It’s a sustainable way to reuse an old stump instead of cutting it down entirely. Perfect for gardeners who love repurposing materials or creating unique garden features.
Let’s get started with the step-by-step process!
📚 In This Guide
- What you need
- Instructions
- Tips and common mistakes
- Wrapping up and next steps
What you need
- ● Tree stump: Freshly cut (preferably within the last 6–12 months) or dried; diameter should fit your space (small: 4–6", medium: 8–12", large: 14"+).
- ● Drill with spade bit: 1–1.5" diameter (for drainage holes).
- ○ Saw or handsaw: For trimming rough edges (optional but recommended for safety).
- ● Sandpaper (80–120 grit): To smooth splinters and rough spots.
- ● Waterproof sealant: Exterior-grade wood sealant or paint (e.g., Thompson’s WaterSeal or AFM Safecoat; ~1 gallon for medium stumps).
- ● Potting soil: Well-draining mix (e.g., Miracle-Gro Moisture Control or Black Gold Natural & Organic; 2–5 gallons, depending on stump size).
- ● Plants: Choose stump-friendly options like sedum, moss, ferns, or succulents (small pots or cuttings).
- ○ Mulch or decorative stones: For finishing touches (optional but recommended).
- ● Stain or paint: For a polished look (e.g., Behr Premium exterior paint; ~1 quart).
- ● Landscape fabric: To line the stump and prevent soil erosion (cut to fit).
- ● Drainage rocks: Small gravel or pebbles (1–2 lbs) for extra drainage.
- ● Decorative trim: Wood borders or metal edging for a refined edge.
- ● Gloves & safety goggles: For handling rough wood and sealants.
Step-by-Step instructions for transforming a tree stump into a planter
This project turns a leftover stump into a charming, functional planter in under an hour.
🪴 Step 1: Clean and Prepare the Stump
Start by removing any loose bark or debris from the stump using a putty knife or pruning shears. I like to scrape away old moss or lichen first—it prevents mold from growing later. If the stump has deep cracks or holes, fill them with a bit of outdoor-rated silicone caulk to create a smooth base for planting.
Next, give the stump a thorough cleaning with a stiff brush and soapy water. Rinse it well and let it dry completely in the sun for at least 4 hours. This step is critical—moisture trapped in the wood can lead to rot or fungal growth down the road. While it dries, take a moment to inspect the stump for any signs of insect activity. If you spot holes or sawdust-like frass, treat it with a natural wood preservative like linseed oil to deter pests.
💧 Step 2: Line the Stump with a Waterproof Barrier
Lay down a 6-inch square of landscape fabric at the base of the stump to prevent soil from washing out through cracks. This is where most people skip a step and end up with dirt spilling everywhere. Secure the fabric with a few staples or by tucking it into the crevices of the stump.
For extra protection, especially if your stump has deep fissures, add a second layer of fabric folded over the edges. This creates a little reservoir to hold moisture near the roots. If your stump is particularly shallow (less than 4 inches deep), consider adding a 1-inch layer of gravel at the bottom before the fabric. This improves drainage and prevents root rot in moisture-loving plants.
🌱 Step 3: Fill with Soil and Plant Your Selections
Fill the stump about ¾ full with a lightweight potting mix—never garden soil, as it compacts too much and drains poorly. I like to mix in a handful of perlite or coarse sand to improve aeration. Leave about 1-2 inches of space at the top to allow for watering without spilling.
Choose plants that thrive in shallow root environments, like succulents, ornamental grasses, or small shrubs. For a 4-inch-deep stump, I recommend sedum, hens-and-chicks, or dwarf ferns. Press the soil gently around the roots to eliminate air pockets, then water thoroughly until it drains from the bottom. If your stump has no drainage holes, water slowly to avoid runoff.
☀️ Step 4: Add Finishing Touches and Maintain
To give your planter a polished look, wrap the outside of the stump with burlap or moss for a natural, rustic finish. Secure it with twine or small nails for a cohesive look. If you want to add color, paint the stump with an outdoor-safe, non-toxic stain in a shade that complements your garden. Let it dry completely before placing it in your garden.
Place your stump planter in a location that matches your plants' light needs. Most succulents and ornamental grasses need full sun (6+ hours daily), while ferns prefer partial shade (3-4 hours of morning sun). Water when the top ½ inch of soil feels dry, but avoid overwatering—stumps dry out faster than traditional pots. Mulch the surface with a thin layer of bark chips to retain moisture and suppress weeds.
⏰ Step 5: Monitor and Refresh Seasonally
Check your stump planter every 2-3 weeks for signs of stress—yellowing leaves or wilting plants often mean it’s time to water or fertilize. In late winter, refresh the soil with a 2-inch top dressing of fresh potting mix to replenish nutrients. If your plants outgrow the space, transplant them to a larger container or garden bed.
If the stump shows signs of wear—like cracks widening or fabric breaking down—simply remove the plants, refresh the liner, and add new soil. With proper care, your stump planter can last 5-10 years, becoming a beloved feature in your garden. The key is regular maintenance and choosing plants that suit its unique growing conditions.
Tips & tricks for perfect upcycled stump planters
Transforming a stump into a planter is easier than you think—here are my go-to tricks for a flawless finish every time.
Prep Like a Pro: Don't rush the drying time in Step 1! I've learned the hard way that skipping the full 4 hours of sun-drying can lead to moldy surprises later. If you're short on time, place the stump near a fan or in direct sunlight—just keep an eye on it to prevent cracking. For extra insurance, I like to give it a final wipe-down with a mix of 1 part vinegar to 3 parts water before drying, which helps kill any lingering spores.
Fabric Matters: When lining your stump in Step 2, choose a landscape fabric with a heavier weight (at least 3 ounces per square yard) to prevent soil from slipping through cracks. I've had the best luck with woven polypropylene—it's tough, breathable, and won't degrade like some cheaper options. For stumps with deep crevices, fold the fabric edges inward before stapling to create a snug fit that holds soil better.
Soil Selection Secret: The lightweight potting mix mentioned in Step 3 is non-negotiable, but here's my upgrade: mix in 1 part coconut coir to your regular potting mix. This improves moisture retention while still allowing good drainage—a perfect balance for shallow-rooted plants. For larger stumps (over 6 inches deep), you can add a ½-inch layer of orchid bark at the bottom to create better drainage for moisture-sensitive plants.
Plant Pairing: While sedum and hens-and-chicks are my top picks for 4-inch-deep stumps, don't overlook air plants (tillandsias) for a low-maintenance option. These epiphytes thrive in the shallow soil and can even grow directly on the stump's surface if you mount them with floral wire. For a pop of color, consider adding annuals like trailing lobelia—they'll cascade beautifully over the edges and can be replaced yearly.
Pro Tips for Make A Tree Stump Into A Planter
- Transforming a stump into a planter is easier than you think—here are my go-to tricks for a flawless finish every time.
- Prep Like a Pro: Don't rush the drying time in Step 1! I've learned the hard way that skipping the full 4 hours of su...
- Fabric Matters: When lining your stump in Step 2, choose a landscape fabric with a heavier weight (at least 3 ounces ...
Frequently asked questions
Got questions?
You’re not alone—turning a tree stump into a planter is a fun project, but it’s natural to wonder about the details. Here are answers to the most common queries to keep your DIY journey smooth and successful!
Can I use a freshly cut stump, or should I wait?
Freshly cut stumps are fine, but wait 2–4 weeks to let them dry and seal slightly. This prevents rot and makes painting or staining easier. If you’re in a hurry, sand the surface first to remove sap and moisture.
What if my stump is rotting or hollow?
Rotting or hollow stumps won’t hold soil well and may collapse. Skip these—opt for a solid, healthy stump or a smaller, stable one. If you’re unsure, tap it: a hollow sound means it’s not ideal for planting.
Do I have to paint or seal the stump?
Not always! If you love the natural look, skip sealing and line the stump with landscape fabric to block weeds. But sealing (with outdoor paint or sealant) adds durability, especially in rainy climates, and protects against pests.
What’s the best way to keep weeds from growing around the planter?
Weeds are sneaky! Line the stump’s interior with landscape fabric before adding soil, and apply mulch or gravel around the base. For extra defense, use a stump barrier (a plastic collar) to block weed growth.
Will this planter work in cold winters?
Yes, but drainage is key. Drill holes in the bottom if your stump isn’t naturally porous, and use lightweight potting mix. In freezing temps, move potted plants to a sheltered spot or wrap the stump in burlap for insulation.
What if I don’t have power tools?
No problem! Use a hand saw, chisel, and hammer for shaping. For sealing, a brush or roller works great. Just plan for more elbow grease—this project is still totally doable with basic tools!
Wrapping up and next steps
Transforming a tree stump into a planter isn’t just creative—it’s a fantastic way to breathe new life into your garden while reducing waste! With just a few tools and a little elbow grease, you’ve got a charming, functional piece that adds rustic flair to any outdoor space. 🌿✨
Now that you’ve mastered the basics, why not take it further? Experiment with paint, moss, or even vertical gardens to customize your planter. Or, share your newfound skills with fellow gardeners—your stump-turned-planter could inspire someone else’s next DIY project! Happy planting! 🌱💚